The Real Problem With Your Pantry (It’s Never Just the Mess)
A pantry, in the old sense, was a dedicated room for bread and provisions, and you can trace the word back through centuries of household design on Wikipedia’s pantry page. Somewhere between those grand old rooms and the reach-in closet most of us ended up with, the design stopped keeping up with how we shop. We buy in bulk now. We cook from a dozen cuisines. We keep snacks for three different people with three different schedules. And the shelves stayed the same: too deep, too dark, too far apart in the wrong places.
Thank you for reading this post, don't forget to subscribe!
Here’s a pattern I’ve seen in almost every pantry I’ve opened, including my own. The front row of each shelf is fine. The middle row is a guess. The back row is a mystery zone where expired things go to be forgotten. People blame themselves for this, but the shelves set them up. Anything deeper than about twelve inches means something has to live in shadow, and nobody shops their own shadow.
Search interest tells the same story from another angle. If you look at Google Trends, pantry organization searches climb a steep hill every single January, right alongside “food waste” and “meal planning.” People aren’t hunting for prettier shelves. They’re hunting for a kitchen that stops costing them money. The frustration that sends you searching is usually one of three moments: you bought a duplicate of something you already owned, you threw out something that went bad before you found it, or dinner took twenty minutes longer than it should have because you were excavating.
The fix isn’t willpower, and it isn’t a label maker, even though I’ll defend label makers until my last breath. The fix is zones that match how you cook and how you shop. A grocery store doesn’t shelve the salsa next the laundry detergent. It groups like with like, puts the everyday stuff at eye level, and keeps the backup stock up top or in the back. Your pantry should run on the same logic, because that’s the logic your brain already uses when you’re walking the aisles with a cart.
One more thing before the ideas start. Every one of them works better after a reset, not before. Skip down to the five-step section if you’re mid-panic, then come back. The order matters more than the bins.
Pantry Organization Ideas for Walk-In Pantries (Ideas 1–4)
A walk-in pantry is the dream, and I say that having been lucky enough to have one. Here’s the honest part: walk-ins fail the same way small pantries do, just with more square footage to fail in. Deep shelves create shadow zones. Tall shelves need a ladder nobody wants to fetch. And a door you can close means the mess has somewhere to hide. These four ideas fix all three problems.
1. Treat Your Walk-In Pantry Like a Grocery Store Aisle
Organize by category, one category per shelf bay, and label the edge of each shelf so you can read it while standing in the doorway. Baking on one bay, breakfast on the next, canned goods on the third. My neighbor did this to her walk-in last year after years of “where do the new groceries go” arguments, and her husband took over the shopping within a month. Not because she asked. Because he could finally find things without calling her from aisle five of the store and from aisle two of the pantry. That’s the real test of a walk-in system: a second person can shop it and restock it without a map.
2. Adjustable Shelving That Fits Your Cereal, Not the Other Way Around
Fixed shelves are the enemy of a walk-in pantry, because your stuff doesn’t come in one height. Cereal boxes need about thirteen inches. Cans need six. Bulk flour bags need ten. If every gap is sixteen inches, you’re wasting half your pantry as air. Track-based adjustable systems fix this in an afternoon: elfa from The Container Store is the one I’ve installed twice and would install again, and there are solid wire and wood-track options at Home Depot and Lowe’s for less. While you’re at it, make one shelf shallow — eight or ten inches deep — and put it at eye level. A shallow shelf can’t grow a shadow zone. It physically can’t hide anything from you.
3. The Bulk-and-Backup Zone (Plus a Stool That Lives in There)
The top of a walk-in pantry is for one thing only: sealed backup stock. The extra olive oil, the second bag of rice, the twelve-pack of pasta you bought because the price was right. Do not let backup stock mix with everyday zones, or you’ll end up with three open bags of the same flour and no idea which is freshest. Keep a cheap folding step stool parked inside the pantry door — a $25 one from the hardware store is fine — because the stool you have to walk to the hall closet for is a stool you’ll use to justify leaving the bulk bag on the counter, and then the counter is gone forever.
4. Door Racks and Wall Strips for the Dead Zones
The back of the door and the side walls of a walk-in are the most wasted square footage in the average home. An over-door wire rack turns that space into shallow shelves that are perfect for jars, boxes, and packets, the small stuff that gets lost on deep shelves. A pegboard panel on one side wall holds measuring cups, bag clips, scoops, and the odd kitchen tool that has no other home. If you’d rather not put holes in anything, 3M’s Command line makes hooks and small racks that hold a surprising amount and come off clean. Check the hinge side clearance before you buy a door rack, though. I learned that one the loud way.
Pantry Organization Ideas for Small Closets (Ideas 5–7)
The small closet pantry is the most common kind I’ve worked on — the converted linen closet or hall closet, usually twenty-four to forty inches wide, with a door and just enough depth to cause trouble. Done right, a small closet holds an alarming amount of food. Done wrong, it’s a vertical junk drawer. The difference comes down to three moves.
5. Turn a Small Closet Into a Real Pantry
Take the closet seriously as a pantry, not as a closet that happens to hold food. That means the clothes rod comes out, and the shelf spacing gets planned around your zones instead of around hangers. Aim for shelves about twelve inches deep — deep enough for cereal boxes, shallow enough that nothing gets stranded in the back rows. The first closet I converted was twenty-eight inches wide and got five shelves plus an over-door rack, and it held more usable food than the kitchen cabinets it was rescuing. If the closet has bi-fold doors, consider swapping them for a curtain on a tension rod or a barn-style slider; bi-folds block half your access every time they open, and half of a small closet is a lot to lose.
6. Stackable Clear Drawers, Floor to Ceiling
Below knee height, open shelves are close to useless — you can’t see the shelf, so you can’t shop it. Stackable clear drawers fix that. The small six-quart size pulls out like a drawer and turns the bottom third of the closet into real storage instead of the land where old granola bars go to expire. Use one drawer for toddler snacks, one for tea, one for spice backups. The drawer pulls all the way out, comes to the counter, gets restocked, and goes back. One tip from hard experience: buy one brand and stick with it. Different brands of stackable drawers almost never stack cleanly together, and a leaning tower of snack drawers is nobody’s dream aesthetic.
7. Turntables on Every Level
A turntable is the single best dollar-for-dollar upgrade in a narrow closet, because a closet shelf is too narrow to dig through sideways. Put one or two lazy Susans on each shelf level — OXO makes the ones that spin smoothly under weight, and a 10- or 12-inch size fits most closet shelves — and load them with the small stuff: sauces, vinegars, nut butters, spice jars, honey. When you need the soy sauce, you spin, you grab, you’re done. No more pulling out four bottles to reach the fifth. Two turntables side by side on one shelf roughly double your reachable storage, and the spin means the back of the shelf stops existing as a concept.
Pantry Organization Ideas for Small Spaces and Apartments (Ideas 8–10)
No pantry at all? You’re in good company, and you’re not stuck. Apartment kitchens and small homes just need the pantry to exist somewhere else, and the somewhere else can’t involve permanent renovation. These three ideas are all renter-safe, mostly reversible, and cheap enough to leave behind if you move.
8. A Plain Bookcase Becomes the Pantry
A five-shelf bookcase, about twelve inches deep, is a pantry in disguise, and it’s the solution I’ve recommended most to renters. Push it against whatever wall the kitchen can spare, anchor it to a stud for safety — this step is non-negotiable if there are kids in the house — and load it with your zones, same as any pantry. A bookcase is shallow by nature, which means no shadow zone, and adjustable shelves mean the cereal fits without air gaps. A friend in a studio apartment built hers for about sixty dollars total: bookcase, tension rod, and a curtain to close it off when company came over. Two years later she took the whole thing apart, moved it across the city, and rebuilt it in an afternoon. Try doing that with built-in cabinets.
9. The Over-the-Door Organizer Trick
A 24-pocket over-the-door shoe organizer is vertical storage that nobody thinks to use for food, and it’s perfect for everything that comes in packets and pouches. Granola bars, oatmeal packets, seasoning mixes, tea, applesauce pouches, drink powders, the little noodle cups. Each pocket holds one category, you can see everything at a glance, and the whole thing costs about fifteen dollars. It works on the back of any door — bedroom, hallway, pantry, the closet door if you’ve converted the closet — and it takes exactly zero floor space, which matters when your kitchen is also your dining room and also your office. Keep heavy jars and glass on the shelves, though. The pockets take light stuff only.
10. A Slim Rolling Cart for the Dead Gap
Almost every kitchen has a gap it doesn’t use: beside the fridge, next to the stacked washer, between the counter and the wall. The IKEA RÅSKOG cart is about sixteen inches wide, it’s on wheels, and it turns dead gap into a three-tier mini pantry. Load it with a themed zone — all the coffee things, or all the snacks, or all the baking bits — and roll it to wherever you’re working, then roll it back. I’ve seen one live between a fridge and a wall in a one-bedroom apartment, holding an entire sourdough hobby. The cart also makes a natural boundary for the snack station idea later in this post, if you’d rather keep chips and cookies out of the main pantry and rolling around at kid height.
Pantry Organization Ideas for Kitchen Cabinets (Ideas 11–13)
For a lot of people, “the pantry” is one or two cabinets, and cabinets are deep, dark boxes by design. The average base cabinet is twenty-four inches deep, which means the back third of every shelf is a place food goes to disappear. These three ideas make cabinet storage behave.
11. Lazy Susans for Deep Cabinets
Same tool as the closet, same physics, bigger stakes. Put two turntables side by side on a deep cabinet shelf and divide the small stuff between them: oils and vinegars on one, canned goods and jars on the other. Spin to reach, grab, done. In a corner cabinet, use a pie-cut turntable shaped for the corner, and the most useless space in the kitchen suddenly works like a carousel. Before I did this in my own kitchen, the back corner of one cabinet held a bottle of truffle oil I’d forgotten I owned for so long that it turned on me. Oil goes rancid, and rancid oil smells like old crayons. Ask me how I know, or better, don’t.
12. Pull-Out Baskets in Base Cabinets
If you own a screwdriver, you can retrofit a base cabinet with pull-out wire baskets in about twenty minutes per basket, and it changes the entire cabinet. The baskets screw onto the existing shelf and slide out on rails, so the back of the cabinet comes to you instead of you going to the floor on your knees with a flashlight. Retro-fit pull-outs run twenty to forty dollars at Home Depot depending on width, and the lower baskets are ideal for heavy things: potatoes and onions in a ventilated wire basket, pet food bags, the big flour sacks you keep swearing you’ll bake through. One pull-out in the right cabinet eliminates more crouching than any other upgrade on this list.
13. Inside-the-Cabinet-Door Storage
The inside of a cabinet door is a wall, and walls can hold things. Command hooks on the inside of a cabinet door keep the foil, cling wrap, and parchment boxes hanging upright where you can grab them one-handed, instead of lying flat under something heavier. A small adhesive rack holds measuring spoons or pot lids. A narrow door-mounted strip holds spices at eye level while you cook. Check the swing clearance before you mount anything — the door needs to close, and the shelves need to clear the contents — and use removable strips if you rent. This is storage you discover you needed the moment it exists, and it costs about ten dollars a door.
Pantry Organization Ideas for Shelves That Waste Vertical Space (Ideas 14–15)
Open shelves and fixed pantry shelves share a disease: dead air. The gap above the cereal boxes, the stack of cans that could be two stacks, the six inches above the flour jars where nothing lives. Vertical space is the cheapest space you own, because it’s already yours. These two ideas claim it.
14. Shelf Risers, the Cheapest Win in This Whole Post
A wire shelf riser is a little table that sits on your shelf and creates a second level, and at nine to fifteen dollars it’s the best value in pantry organization. Under a sixteen-inch gap, a riser turns one row of cans into two, one layer of jars into two, a coffee shelf into a coffee shelf with a mug rail. Stack two risers for plates-adjacent items like flat boxes of stock and tea. The change is instant and a little ridiculous in how satisfying it is. I once reorganized a single shelf with three risers during a commercial break, stood back, and felt like I’d doubled the kitchen. Two feet of shelf became four. No renovation, no tools, no holes.
15. Under-Shelf Baskets and Tension Rods
If you can’t add a shelf, hang one. A clip-on wire basket grips the shelf above and turns its underside into a bin — great for chips, kitchen towels, foil pouches, and anything light and floppy that refuses to stack. A tension rod mounted under or beside a shelf, fitted with shower-curtain hooks, gives you a rail to clip opened snack bags onto, upright and visible. The full setup costs about ten dollars at the hardware store. This pair of tricks is how you make one fixed shelf behave like two, and it works in rentals, dorms, offices, and that one weird cabinet over the fridge that came with the apartment and has never once been organized by anyone.
Aesthetic Pantry Organization Ideas That Still Earn Their Keep (Ideas 16–17)
Want a pantry that looks as good as the ones on Pinterest? That’s a fair want, and you can have it. The trap is chasing the look before the function, because a beautiful pantry that hides your food is just a museum with a door. Do the reset first, then layer the pretty on top. These two ideas give you both.
16. Clear Jars, One Height Language
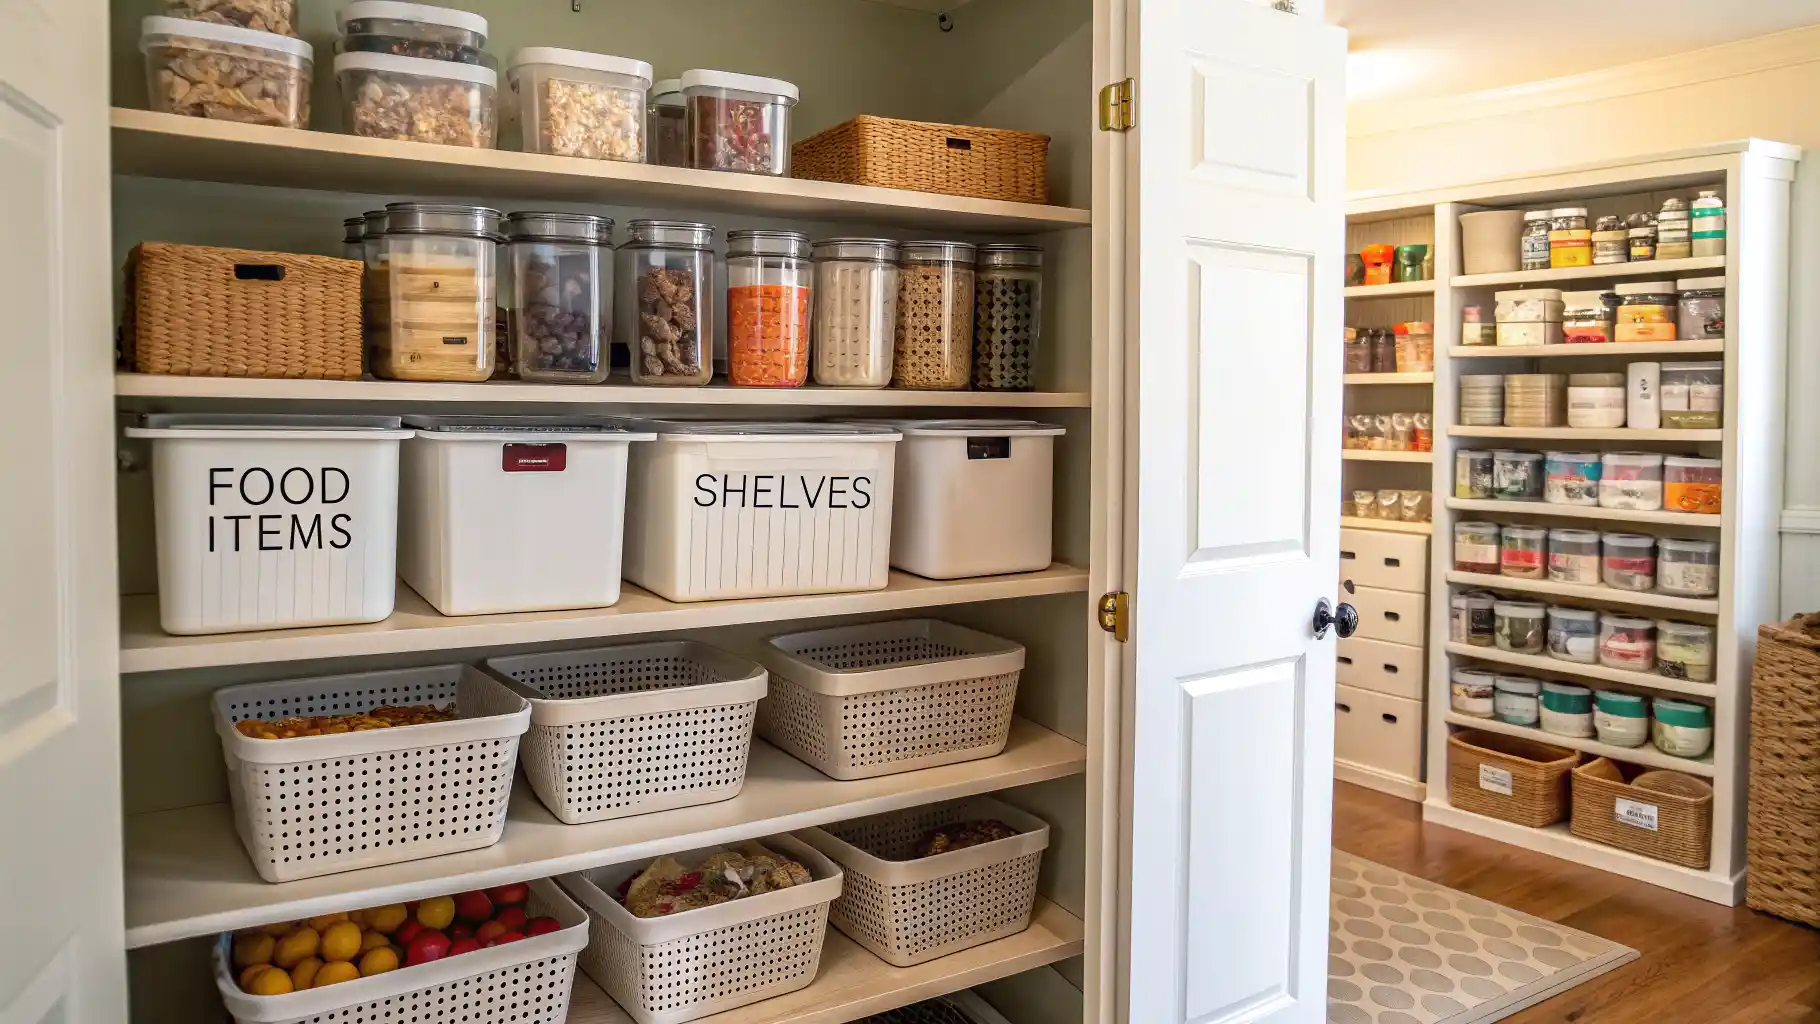
Matching glass jars on open shelving is the look, and it works because it’s also genuinely functional — you can see every staple, and staples stop going stale in half-closed bags. Square jars beat round ones on shelf math, and push-button sealers are the gold standard: OXO’s POP containers and Rubbermaid’s Brilliance line both keep flour, sugar, rice, oats, pasta, and lentils fresh and stackable, and Wirecutter has tested the major brands against each other so you can compare before committing. Two rules from experience. First, buy jars two weeks after the reset, not before — you need to know your real quantities, or you’ll end up with a gallon jar for something you use a teaspoon of monthly. Second, keep the cooking instructions. Tape the cut-out panel from the rice bag inside the lid or onto the jar’s back, with the date. A jar of mysterious grains nobody can cook is not a finished system. Joseph Joseph and a few other brands now make containers with built-in labels for exactly this reason.
17. Woven Baskets and Warm Wood Tones
The one weakness of the all-clear-jars look is that some things will never be pretty: the chip bags, the foil pouches, the sippy cup lids, the mismatched boxes. Don’t fight this. Corral the ugly-but-necessary into matching woven baskets, and let the baskets carry the aesthetic. A row of seagrass or water-hyacinth bins on wooden shelves, with wood-lidded jars in front, reads as warm and intentional rather than sterile — the difference between a kitchen and a laboratory. Stick to one material family for everything; three different basket weaves is a texture fight nobody wins. My mother’s open shelves are the version I point to: white jars, natural baskets, wood risers, and a dark, ventilated basket for potatoes, which keeps them in the cool shade they want instead of the fridge. Her pantry photographs beautifully and, more importantly, her potatoes stopped sprouting in a week.
Pantry Organization Ideas for Cans (Idea 18)
Cans are the workhorses of the pantry, and they cause a disproportionate share of the chaos, because they’re heavy, they roll, and they stack into unstable towers that fall at the worst moment. Give them one dedicated home and the rest of the pantry calms down.
18. Can Racks and First-In-First-Out Flow
Use stackable can risers — the stepladder-shaped wire racks that let you see every label at a glance — and organize them like a stocker at a grocery store would. Grocery stockers rotate product using first in, first out, the same inventory method warehouses use: new cans go in the back, old cans move to the front, and nothing gets stranded until it expires. Write the month on the top of each can with a chalk marker if you want to be precise, or just make it a habit that new cans always enter from the rear. Group cans by type — beans, soup, tomatoes, vegetables — two rows deep at most, because a third row is a shadow row again. And set a personal rule: any can that hasn’t moved in six months goes into the donation box. The soup you keep not eating is not a soup you own. It’s a soup you’re storing for the food bank, rent-free.
Pantry Organization Ideas for Chips and Snack Chaos (Idea 19)
Chips are the hardest food to organize, and I’ll die on this hill. The bags are full of air, they’re odd sizes, they can’t stand up on their own, and once opened they’re on a timer. The crinkle hunt — that thing where you dig through three cabinets following the sound of a bag you know is in there somewhere — is a universal experience for a reason. Here’s the end of it.
19. A Snack Station That Ends the Crinkle Hunt
Build one snack station, and put everything chip-like in it. Standing bags upright is the whole trick: a magazine file or a tall, narrow bin holds chip bags like books on a shelf, spines out, every flavor visible in one glance. Sealed backup bags stand in the back of the same bin or a second one, and the open bag always goes in front, clipped shut with a binder clip — clip it to the bin’s edge or the wire shelf itself, and the bag hangs open-mouthed and sealed at the same time. Give the station a home at kid height if you want self-service snacks, or up high if you’d rather not, which is also a system. The rule that keeps it working is the “one open bag” rule: a new bag doesn’t open until the open one is finished. My friend keeps a game-night basket this way — chips, pretzels, popcorn, all standing in a wire basket on top of the fridge — and refills it from a backup bin in the closet. Her kids stopped asking where the snacks are, because there is only one answer now, and everybody knows it.
Pantry Organization Ideas With Labels That Everyone Follows (Idea 20)
Labels are the last step and the most skipped one, which is a shame, because labels are the difference between a system you maintain and a system that maintains itself while you’re away. A label is not decoration. It’s an instruction to the next person who opens the pantry, including the future version of you who’s tired, in a hurry, and holding a grocery bag.
20. Labels Written for the Tired Version of You
Label zones, not brands. A bin that says SNACKS works forever; a label that says “Sour Cream & Onion + Baked Lays” is wrong the moment the shopping list changes. Use one font and one format everywhere — a DYMO label maker prints clean, consistent labels, and a chalk marker on painter’s tape does the same job for three dollars. For pre-readers, add pictures: a drawing of a cookie on the snack bin means a four-year-old can put things away correctly, and kids who can put things away correctly become kids who put things away. Then run the household test I use on every pantry I finish: hand someone a bag of groceries and walk away. If they can put everything in the right place without asking you a single question, the labels pass. If they ask, the label is wrong, not the person. Relabel after a month of real use wherever a zone kept failing — that’s not the system breaking, that’s the system telling you what it wants to be.
Pantry Organization Ideas on a Budget: What’s Worth $10 and What Isn’t
You can spend four hundred dollars on a pantry and end up with a worse system than the forty-dollar version. I’ve watched it happen. The price of a thing and the usefulness of a thing are barely related in this category, so here’s the honest breakdown.
Worth the money, every time: one turntable at thirteen dollars, because it doubles reachable shelf space. Shelf risers at nine to fifteen dollars, the cheapest new space you’ll ever buy. The over-the-door organizer at around fifteen, which is vertical storage for the price of lunch. A chalk marker and painter’s tape at five, which is your whole labeling system. A clip-on under-shelf basket at eight. If you bought nothing else, that’s roughly fifty dollars, and it addresses every pantry type in this post.
Not worth it, most of the time: a full custom jar set before the reset, because you don’t know your quantities yet. Matching designer bin sets, which look identical in photos to the budget ones and cost five times more. Anything that locks you into one brand’s refills. And label systems that cost more than the labels from the office-supply aisle, which are the same labels.
The budget playbook works: Dollar Tree sells small plastic bins and baskets that hold up fine for years at a fraction of the big-store price. Thrift stores are full of mason jars at a dollar or two each, and a jar plus a chalk label is a decanted staple for pocket change. Shoe boxes wrapped in contact paper make honest drawer dividers. Free counts too: the Sharpie you already own plus masking tape is a labeling system, and printable pantry labels from any design blog cost nothing but ink.
Where I’d spend real money without hesitating: an adjustable track system if you’re converting a closet, because shelves that move are the backbone of everything else, and a good stool if you have high shelves, because your safety is worth more than a pantry. That’s it. Everything else, buy cheap, buy boring, buy after the reset.
Where Pantry Makeovers Fall Apart
Every failed pantry I’ve been called in to rescue failed for one of seven reasons. None of them were about effort. All of them were fixable.
Buying bins before the sort. This is the big one. Bins bought before the reset get filled with whatever’s closest, the categories never form, and in three months the bins are just smaller rooms for the same chaos. Reset first. Shop second.
Decanting everything. Not everything wants to live in a jar. The cocoa you use twice a year, the specialty flours, the giant Costco bag of puffed rice — these want their original packaging with its dates and instructions. Decant the staples you touch weekly. Leave the rest in the bag, in a basket, labeled. Done.
Deep bins with no pull access. A deep bin on a deep shelf is a hole with a lid. You will put things in it, and you will see them again on moving day. If it’s deep, it must pull out, turn, or slide. That’s the whole rule.
Organizing to match the store, not your kitchen. If your family eats oatmeal five mornings a week, the oatmeal goes at eye level in the breakfast zone, even if the supermarket puts it on the cereal aisle’s bottom shelf. You’re not running a store. You’re running a household.
No landing space. A pantry at 100% capacity has no room for the next grocery run, so groceries land on the counter, and the counter becomes the pantry, and the game is lost. Leave one shelf a third empty on purpose. That gap is not wasted space; it’s the loading dock.
A system only one person can run. If the organizational logic lives only in your head, the pantry is one busy week away from collapse. Zones, labels, and one open bag rule exist so the system survives without you. Design for the weakest-motivated member of the household, lovingly.
Forgetting the loop. A pantry is a system with inputs and outputs, and it needs a check-in. Ten minutes on the first of the month: scan dates, wipe one shelf, note what needs eating, and update the running list on the door. A small whiteboard or a piece of paper in a page protector on the inside of the door saves more money than any bin, because it’s how the pantry talks to your shopping list.
Pantry Questions I Hear Every Week
How do I organize a kitchen with no pantry at all?
The bookcase pantry, the over-door organizer, and a slim rolling cart, in that order. That trio gives you zones, vertical storage, and a movable shelf for under a hundred dollars combined, none of it permanent. Claim one wall near the kitchen and treat it like the pantry aisle it’s about to become.
What containers are best for flour and sugar?
Airtight, square, and clear, in that order of importance. Airtight keeps moisture and weevils out, square stacks without wasting shelf edges, and clear means you see the level drop before you run out mid-recipe. Buy them after the reset, in the sizes your real habits demand — most people need far fewer giant containers than the store displays suggest.
How often does a pantry need a full reset?
Twice a year, with monthly ten-minute scans in between. The deep reset — empty, sort, date-check, donate — is an afternoon. Do one in late spring and one before the holiday cooking season, and the pantry never gets bad enough to need a heroic weekend again.
Where should cans and heavy jars go?
Low. Always low. Below the waist, in a single layer whenever possible, on risers or in a pull-out. Heavy items up high are a falling-object risk, and every pantry I’ve redone had at least one top-shelf can tower that made me wince. Keep the light, sealed, rarely-used stuff up top.
How do I keep the pantry tidy with kids?
Give them a zone at their height, label it with pictures, and make it the only snack source. Kids don’t wreck pantries out of malice; they wreck them hunting. A visible, reachable, labeled snack drawer ends both the hunting and the wrecking, and it teaches the system in the process.
Start With One Shelf Tonight
You don’t need a free weekend and four hundred dollars. You need twenty minutes and one shelf — the one that annoys you most, the one you open and sigh at. Empty it. Toss what’s dead. Sort what’s left into like with like. Label it with whatever’s in the junk drawer. That’s it. That’s the whole assignment.
Tomorrow, do the next shelf. The reset takes shape faster than you’d believe once one shelf shows you what the rest could look like, and the bins you buy later will be the right ones, because you’ll finally know what you’re holding.
A pantry has one job: feed the household without wasting your money or your evenings. Twenty small ideas in the right order do that job, shelf by shelf, in every kind of kitchen — the walk-in, the closet, the cabinet, the bookshelf in the corner of a studio. The cumin jars are in there somewhere. This time, you’ll find all three on the first try.


