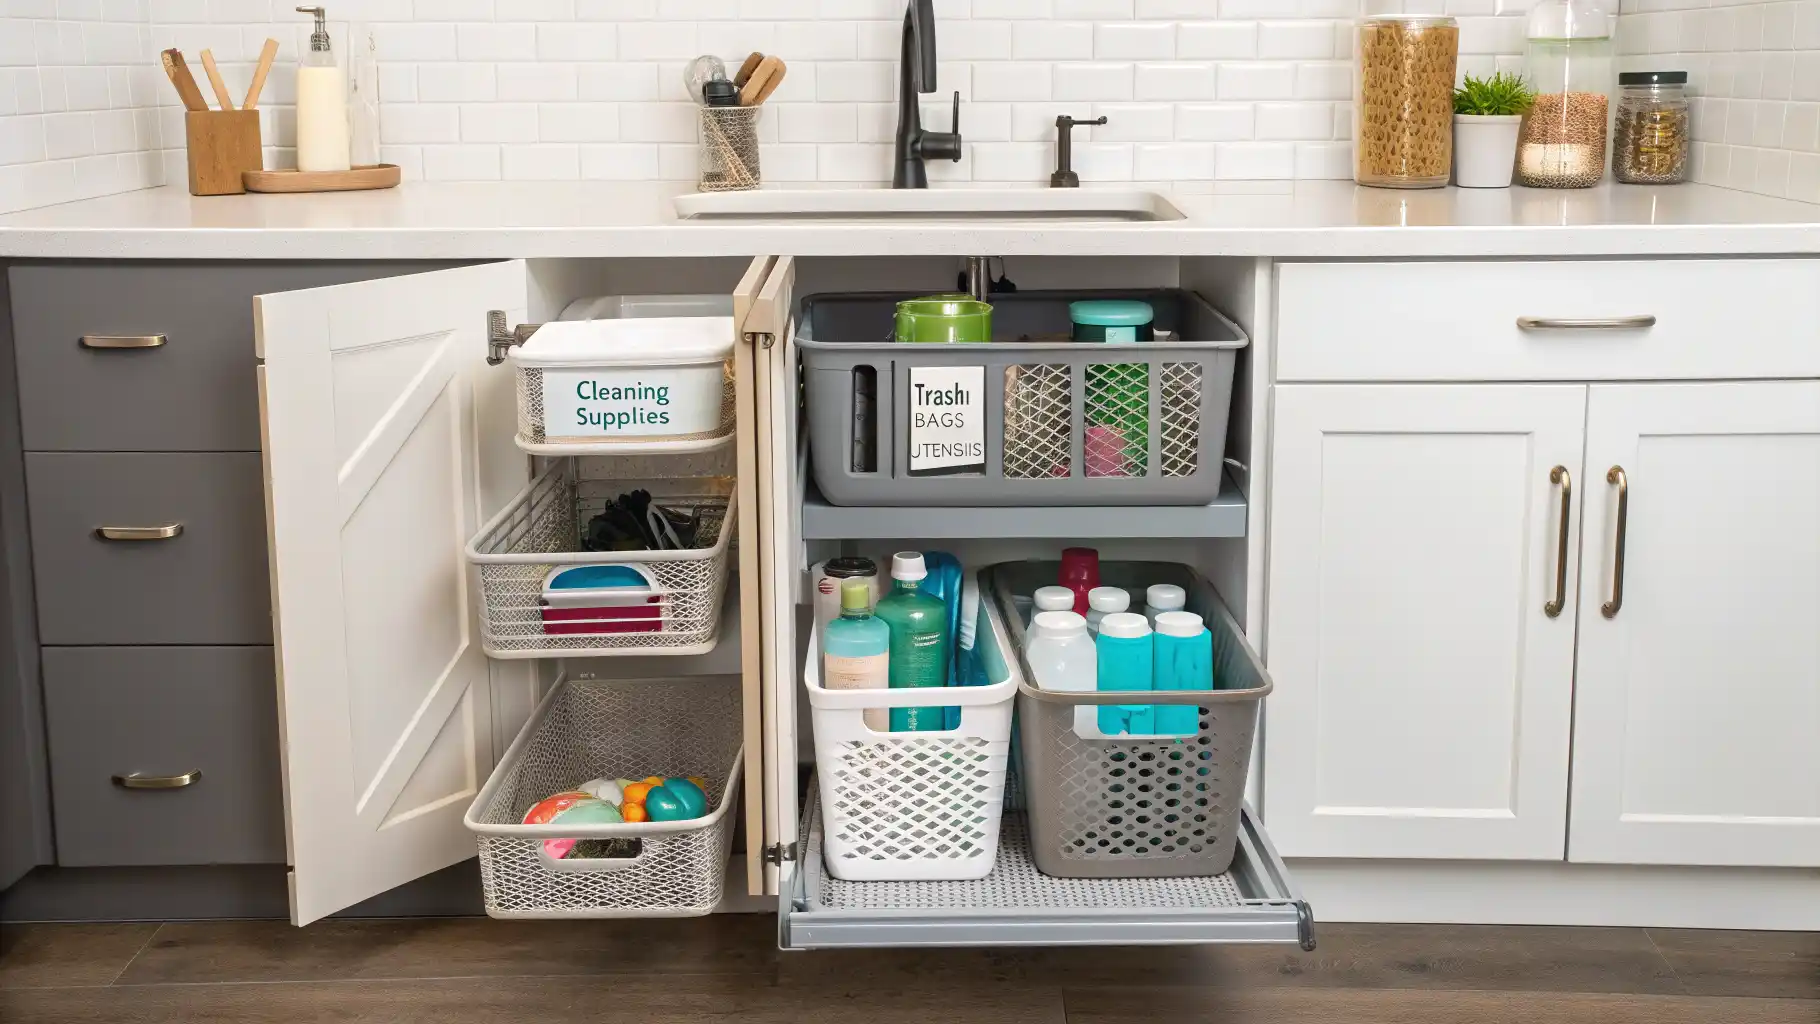
20 Under-Sink Kitchen Organization Ideas That Make Every Inch Easier to Use
You open the cabinet under the kitchen sink for a fresh sponge. A spray bottle tips forward. The trash bags are somewhere behind a stack of cloths. There’s a half-used cleaner you forgot you owned, and the thing you need is pressed against the back wall.
Thank you for reading this post, don't forget to subscribe!
The trouble isn’t always a lack of space. It’s that everything shares one awkward space without a clear place to land.
These under-sink kitchen organization ideas are for renters and homeowners who want that cabinet to work better during everyday cleanup. The goal is specific: make the supplies you use easy to reach and return, without burying plumbing or filling the cupboard with organizers that don’t fit.
That matters most in small kitchens, busy households, and cabinets divided by pipes or a garbage disposal. A workable setup can save you from unloading half a shelf whenever you need a trash bag.
You don’t need twenty new products. You need to choose the few ideas that match your cabinet, your household, and the supplies you genuinely use.
There’s also a difference between a cabinet that looks tidy in a photograph and one that stays useful. Matching bottles can hide important labels. A deep basket can become another place to lose things. An empty strip beside a pipe may be more valuable than a shelf squeezed into it.
Start with access. Let appearance follow.
Before You Buy Storage, Find Out What Your Cabinet Can Handle
Empty the cabinet before measuring it. A bottle leaning against a pipe can hide a fitting, and a basket may cover a swollen patch in the cabinet floor. Wipe the base, let it dry, and inspect the corners, pipe connections, and underside of the sink.
If you find recurring moisture, deal with the cause before adding storage. A liner won’t repair a leak, and a bin can conceal one. The U.S. Environmental Protection Agency’s guidance on mold cleanup emphasizes fixing water problems rather than treating the visible mess alone. In a rental, report dampness or damaged cabinetry to the property manager.
Measure the opening as well as the interior. A cabinet can be wide inside but have a narrow entrance because of its hinges or center frame. Record the clear height beneath the sink bowl, the depth with the door closed, and the usable width on each side of the plumbing.
Check the path an organizer must travel, too. A drawer needs room to slide past the hinge. A turntable needs clearance through its full rotation. A door basket must miss whatever sits behind it.
Then decide what belongs here. Cleaning cloths, trash bags, and suitable household supplies may fit the job. Food, pet food, medicines, and other items that shouldn’t share space with cleaners need another home.
If children or pets can access the cabinet, chemical storage needs a separate safety decision before any shopping begins.
Under-Sink Kitchen Organization Ideas That Work Around Real Life
1. Start Your Under-Sink Kitchen Organization Ideas With a Removable Tray
A shallow, removable tray gives loose supplies a defined home and makes the cabinet floor easier to clean. It can also help contain a small product drip. Choose a smooth, washable tray with a low raised edge that you can lift out without disconnecting anything.
Measure around plumbing that enters through the cabinet base. A tray that requires awkward cuts or permanent fastening may make inspection harder. Two smaller trays can be more useful than one oversized mat, especially when pipes divide the space.
For example, place dishwashing supplies on one tray and a small cleaning caddy on another. If detergent runs down a bottle, you can remove the affected tray instead of wiping around every item in the cupboard.
Avoid absorbent fabric as the main base layer. It can hold moisture against the cabinet and make a small wet patch harder to see.
Treat the tray as a cleaning aid, not waterproofing for the whole cabinet. Lift it periodically and look underneath. If water appears again after you dry the area, investigate the source rather than adding another protective layer.
2. Give Everyday Supplies the Front Row
The easiest space to reach should hold the things you use most often. That sounds simple, but cabinet layouts often give the front row to whichever bottle was put away last.
Choose your daily group deliberately. It might be dish soap, dishwasher detergent, trash bags, and two clean cloths. Keep that group near the opening, with labels facing forward and enough space to lift each item without shifting its neighbor.
Weekly supplies can sit farther back. Occasional products may belong elsewhere.
Imagine cleaning up after dinner with wet hands. If replacing the dish soap means lifting a basket, moving a refill, and reaching behind the drain, the arrangement asks too much of a routine task. Put the soap where one straightforward reach is enough.
A useful test is to stand where you normally wash dishes and open the cabinet. Can you reach your most-used supply comfortably? Can you return it just as easily?
Pay attention to both movements. A product that is easy to remove but awkward to replace often ends up on the counter, where a new pile begins.
3. Fit a Narrow Pull-Out Beside the Pipes
A narrow pull-out can make the strip beside a drainpipe far more useful. Instead of reaching blindly into a deep cabinet, you bring the contents toward you.
Before buying, check the organizer’s outside dimensions, mounting requirements, and clearance needs. Product photos usually show generous openings. Your cabinet may have a center stile, a projecting hinge, or a door that doesn’t swing fully out of the way.
Also measure the height with bottles inside. A sliding basket may fit beneath a pipe while the trigger on your tallest spray bottle catches it.
Specialist manufacturers such as Rev-A-Shelf offer several types of cabinet storage. Use their product drawings and installation instructions to understand clearances, rather than choosing by appearance alone.
This approach works well when one side of the cabinet has a clear, uninterrupted floor area. Keep the load within the manufacturer’s limit and check that a freestanding model remains stable when extended.
For a rental, choose a removable design unless you have permission to install hardware. If the drawer only opens when you twist it around a pipe, it isn’t the right fit.
4. Use an Adjustable Shelf Around Awkward Plumbing
The empty space above short bottles can look wasteful. An adjustable shelf may help, but only where the plumbing leaves a clear pocket of height.
Choose a shelf with movable sections or a shape that fits beside the drain. Set its legs on a firm, level surface. Nothing should rest on a pipe, supply line, hose, or fitting.
Use the upper level for light, short items such as dry cloths, spare sponges, or a small box of dishwasher supplies. Taller containers can stay on the cabinet base.
Picture a cabinet with the drain running down the center and a clear area on the left. A compact shelf in that left section may create useful storage without forcing a full-width organizer around every obstruction.
Leave enough hand room above stored items. A shelf that technically accommodates a bottle but doesn’t let you lift it comfortably creates more frustration than capacity.
Check the load rating and test stability before filling it. If the shelf wobbles when you remove a cloth, choose a sturdier option or simplify the arrangement. Useful height matters more than maximum height.
5. Put Short Items in Stackable Drawers
Small supplies disappear quickly in deep baskets. A spare sponge slides beneath a cloth. Scrub pads collect at the bottom. You buy replacements because the unopened pack is out of sight.
Shallow drawers give those items separate, visible spaces.
Use them for clean, fully dry cloths, spare brushes, sponges, or other small supplies suited to the cabinet environment. Keep chemical products in their original packaging, and don’t let a drawer create easy access for children.
Check the opening clearance before stacking anything. The top drawer must clear the sink bowl, and the lower drawer needs room to move without hitting a hinge. Follow the manufacturer’s stacking guidance rather than balancing unrelated containers together.
A simple arrangement might have cloths in one drawer and spare scrubbers in another. That is usually more useful than five tiny compartments requiring everyone to remember a detailed sorting system.
Leave room for fingers to grasp the contents. When drawers are packed tightly, putting away laundry becomes a puzzle.
If moisture is a recurring issue in the cabinet, fix it first. Enclosed drawers are not a good place to hide items that are still damp.
6. Make a Portable Cleaning Caddy
A cleaning caddy works best when it holds supplies used together, not every cleaning product in the house.
Build it around a specific task. For kitchen wipe-downs, that might mean a suitable surface cleaner, a clean cloth, and a small brush. Keep any products you include in their labeled containers and follow their storage directions.
Choose a caddy with a comfortable handle and a washable base. Test its weight when full. If carrying it encourages you to leave it permanently on the counter, reduce the load.
For example, after cooking, you can lift out the caddy, clean the counter and cabinet fronts as appropriate, then return the whole group to one space. You don’t need to gather loose items from different corners.
A removable divider can help keep a bottle upright, but leave enough room to grasp it without pulling out everything else.
Don’t store used wet cloths in the caddy. Send them to their washing or drying spot after the task.
The caddy should shorten cleanup. If half its contents aren’t used during a normal kitchen reset, those items probably belong in another storage group.
7. Store Light Tools on the Cabinet Door
The inside of a cabinet door can hold lightweight tools that otherwise lie across the floor. A small brush, an empty dustpan, or clean, dry gloves may fit well here.
Check the closed-door space first. Hold the proposed holder in place, close the door gently, and see whether it touches a pipe, bin, or spray bottle. Leave room for hanging items to move without snagging.
Over-door racks need a compatible door thickness and enough clearance at the top. Adhesive hooks need a suitable surface, correct preparation, and the stated waiting time before loading.
The Command brand’s official site provides product-specific guidance on surfaces, weight limits, installation, and removal. Follow the directions for the hook you choose; different products have different requirements.
Keep heavy bottles off improvised door storage. Their weight can strain the holder or make the door unpleasant to use.
In a rental, check whether adhesive products are allowed and whether the cabinet finish is suitable. Removable doesn’t mean risk-free on every surface.
Door storage earns its place only if the cabinet still closes freely and the tools remain easy to remove.
8. Keep Trash Bags Where You Change the Bin
Trash bags are a good candidate for simple storage because their packaging often takes up more room than the bags themselves.
If the packaging carries information you need, keep it or record the bag size before discarding it. Then place one working roll in a shallow bin, a suitable holder, or an open-front container near the cabinet opening.
Position it close to where you replace the kitchen bin liner. The point is to avoid walking across the kitchen or moving cleaning bottles during a messy job.
A narrow box beside the cleaning caddy may be enough. You don’t need a mounted dispenser unless the roll feeds smoothly and the holder fits without blocking other storage.
Try pulling out a bag before deciding on the location. Some rolls unwind neatly on their sides. Others work better standing upright in a container.
Keep extra rolls behind the working one or in a separate reserve area. Several opened rolls create loose plastic without improving access.
If the bin itself lives under the sink, check that the bags stay clean and separate from spills around the waste container.
9. Use a Turntable Only Where It Can Turn Freely
A turntable can help with a reachable but awkward corner. It can also waste space when pipes interrupt its movement.
Measure the full circular footprint and test the height of the items you plan to store. The tray might clear a pipe while a tall bottle hits it halfway through the turn.
Choose a model with a modest raised edge and enough grip to keep suitable containers stable. Avoid crowding it so tightly that removing one bottle knocks another sideways.
This works best for a small group of similarly sized products in a clear section of the cabinet. It is less useful for tall, top-heavy containers or a corner divided by hoses.
A practical test is to cut a circle from scrap cardboard in the proposed diameter. Place it on the cabinet floor and move your tallest bottle around the edge. You’ll spot several clearance problems before spending anything.
Compare it with a rectangular bin, too. A turntable offers rotation, while a bin may use the available floor space more efficiently.
Choose the option that makes retrieval easier in your cabinet, not the one that looks more satisfying in a video.
10. Divide Supplies by the Job They Do
Sorting everything by size can create a tidy picture while separating items you use together.
Try grouping by task instead. Dishwashing supplies can share one area. Surface-cleaning tools can occupy another. Waste supplies can stay near the bin.
Keep compatibility and label instructions ahead of convenience. Products that must be stored separately should not share a container just because they serve a similar purpose.
For routine supplies, task groups make the cabinet easier to understand. Someone unloading the dishwasher can find detergent without searching through furniture polish or spare brushes.
Use containers to mark the boundaries only where needed. You might need a bin for cloths, but upright bottles on a tray may already form a clear group.
Start with broad categories. Too many narrow labels make the system harder to follow, especially in a shared kitchen.
A good group has a clear purpose and a manageable amount of stock. If a cleaning bin contains everything from dish soap to an old paintbrush, narrow that category or move unrelated items elsewhere.
The test is whether another household member can find and return something without a tour of the cabinet.
11. Separate Refills From Open Products
An unopened refill doesn’t need the same easy access as the product you use every evening.
Give working supplies the front position. Put a modest amount of reserve stock farther back, provided the location meets the product’s storage instructions. Move larger quantities to another suitable, secure area if the cabinet becomes crowded.
Choose a stock limit that matches your habits. For a regularly used product, one open container and one spare may be enough. A household with different shopping needs can choose another limit, but it should still fit the space.
For example, keep the open dish soap near the front and its replacement in a clearly marked reserve bin. When you start the spare, add the product to your shopping list.
That creates a visible buying signal instead of relying on memory.
Keep older suitable stock in front of newer purchases and check any dates or storage guidance on the label.
Bulk buying only helps when the products can be stored safely and used within a sensible period. A bargain that blocks the drain or hides three forgotten bottles makes the cabinet harder to manage.
12. Stand Flat Supplies Upright
Flat supplies are often easier to see when stored vertically.
Fold clean, dry cloths so their edges face upward in a narrow bin. Place suitable packaged scrub pads upright beside one another. Use a divider if the contents collapse when you remove a single item.
This works especially well in a shallow pull-out or a low-sided container. You can see what is available without lifting a stack.
Avoid elaborate folding. A plain fold that fits the container is enough. The aim is to make laundry easy to put away, not add a new household chore.
For example, six folded cloths in one row make the available supply clear. The same six cloths in a loose pile can cover a spare brush and spread across the cabinet base.
Keep only a working quantity here. Extra kitchen textiles can live in a dry linen or utility area.
Don’t compress cloths into a damp corner to make them fit. If they feel cool or moist from recent washing, dry them fully before storing them.
Vertical storage helps only when you can lift one item cleanly and return it without rebuilding the entire row.
13. Give Damp Cleaning Tools a Place to Dry
A wet sponge shouldn’t disappear into a closed drawer just because the counter looks cleaner without it.
Set up a drying location first. A washable, ventilated holder near the sink may suit a sponge or brush. Hang gloves so trapped water can drain and air can circulate, following the product’s care directions.
Move tools into enclosed storage only when they are clean and dry enough for that arrangement.
For reusable cloths, separate the clean supply from the used ones. A cloth that has just wiped up a spill belongs in its washing or drying routine, not back beside fresh cloths.
The CDC’s guidance on cleaning and disinfecting your home is a useful reference for distinguishing routine cleaning from situations that need disinfection. Use products and methods suited to the surface and task.
Under-sink organization won’t replace tool care. It should support it.
A practical setup may leave the everyday brush near the sink while keeping spare brushes below. That small amount of visible storage can be more sensible than hiding moisture behind a closed door.
Clean the drying holder regularly as well. A draining tray still needs attention.
14. Choose Clear or Open-Front Bins for Hidden Corners
Dark cabinets make forgotten supplies easier to overlook. Clear or open-front containers help you see the contents without pulling everything out.
Choose the shape based on access. An open-front bin works well for items you want to grab directly. A clear bin with a handle can suit a deeper space where you need to bring the whole group forward.
Transparent material isn’t essential everywhere. An opaque caddy may be easier to clean or carry. Visibility matters most where supplies would otherwise disappear behind a wall of plastic.
For example, a clear reserve bin lets you check whether there is another box of dishwasher detergent before shopping. A solid basket with a clear label can work just as well if it is easy to remove.
Avoid choosing a tall bin simply because it holds more. High sides can make short items harder to reach beneath a low sink bowl.
If you add a cabinet light, choose one rated for the intended conditions and follow its installation instructions. Keep lights, batteries, and wiring away from possible drips.
Often, moving a bin forward improves visibility enough without adding another device.
15. Label Locations Instead of Labeling Everything
Labels are most helpful when they tell people where something belongs.
A few broad labels on bins or shelf edges can explain the system: cloths, dishwashing, bags, or refills. You don’t need a label on every sponge or brush.
Use plain language that makes sense to the household. Decorative names may look appealing but give less help during a hurried cleanup.
Keep original product labels visible. A storage label identifies a location; it must not cover directions, warnings, or ingredient information on a container.
Try temporary labels during the first week. Masking tape may work on some bins, while a removable tag avoids contact with delicate finishes. Once the arrangement proves useful, choose a more durable label if needed.
For example, if household members repeatedly put spray bottles into the refill area, the category may be unclear or badly positioned. Change the layout before assuming a larger label will solve it.
Labels work best after the cabinet makes physical sense.
A helpful observation here: a system people can understand at a glance needs less correction. Make the right place easy to recognize and easy to reach.
16. Leave a Clear Route to Shutoff Valves
Storage should never make an urgent plumbing task harder.
Locate the water shutoff valves and keep a clear path to them. You should be able to reach the handles without dismantling shelving, lifting a heavy drawer unit, or leaning against other fittings.
Access includes room to move your hand, not just a line of sight. A valve visible through a narrow gap may still be difficult to operate.
Avoid placing organizers where they press against flexible supply lines or catch hoses when a drawer moves. Don’t hang storage from pipes.
The EPA’s WaterSense Fix a Leak Week resources explain why household leak checks matter. In this cabinet, keeping connections visible makes those checks easier.
A useful arrangement might leave the rear center open while placing removable bins along the sides. That can look less packed than a fully fitted system, but it preserves access where it matters.
If you don’t know which valve serves what, ask your landlord or a qualified plumber. Don’t force a stiff or corroded valve as part of an organizing session.
Treat plumbing access as a fixed requirement, not leftover space.
17. Keep a Small Leak-Check Area Visible
You don’t have to leave the whole cabinet bare to make moisture easier to notice.
Preserve a visible area beneath the drain connections and inspect it regularly. Keep nearby containers removable so you can look underneath without a major clear-out.
A battery-powered water sensor may provide an additional warning if it is suitable for the location. Follow the manufacturer’s placement, testing, and battery instructions. A sensor supplements inspection; it doesn’t prevent a leak or guarantee every drip will be detected.
Choose a position where water is likely to reach the sensor, based on the layout and the device’s instructions. Don’t bury it beneath supplies.
Also watch for swelling, staining, a musty smell, or repeated dampness around containers. Those signs deserve attention even if you haven’t seen a puddle.
The EPA’s mold resources provide background on moisture control and indoor mold.
In a rental, document and report suspicious changes promptly. In your own home, investigate the source and arrange repairs when needed.
The purpose of this open space is simple: it lets the cabinet show you a problem before storage hides it.
18. Keep Cleaning Products in Their Original Containers
Matching dispensers can create a neat image, but chemical cleaners need their original labels.
Those labels provide directions, warnings, storage requirements, and first-aid information. Transferring a product into an unmarked bottle can separate it from information someone may need quickly.
Keep cleaners in their original containers unless the manufacturer provides a suitable refill system and directions. Never use food or drink containers for chemical products.
If the original bottles look busy, place them in a plain washable bin with their labels accessible. The cabinet can look orderly without making the products harder to identify.
Don’t combine leftover cleaners to save room. Poison Control explains the hazards of mixing bleach with other cleaners. Organization should never turn into product mixing.
If you want to compare products, the EPA Safer Choice program offers information about products meeting its criteria. Certification does not mean a cleaner can be left within a child’s reach or used without following directions.
Store damaged, leaking, or unwanted products according to appropriate local guidance rather than leaving them in the working cabinet.
A tidy shelf is useful. Clear safety information is more important.
19. Plan for Children and Pets Before Styling the Cabinet
A low cabinet is easy for a child or pet to investigate. That changes what belongs inside it.
If children are present or visit regularly, consider storing cleaning chemicals in a suitable locked location out of their reach. Don’t treat an ordinary latch as a substitute for safer product placement.
Child-resistant packaging is another precaution, not a reason to leave a product accessible. Close containers properly after each use and return them promptly.
The American Academy of Pediatrics’ poison-prevention guidance is a useful reference when planning household storage around young children.
For pets, consider whether they can nose the door open, chew packaging, or lick residue from a leaking container. Keep products secured according to their labels and your household’s needs.
An under-sink cabinet can still be useful without holding chemicals. Trash bags, suitable dry tools, and other nonhazardous supplies may occupy the space instead, while considering any remaining choking or entanglement hazards.
If you install a lock or latch, check it regularly and make sure everyone uses it.
Safety belongs in the layout from the start. Adding a small catch after filling a low cupboard with chemicals may not address the real risk.
20. Leave Enough Empty Space to Put Things Back Easily
The last bit of space can be the most tempting to fill. Resist that urge.
Leave gaps around handles, bottle necks, and the edges of removable bins. Keep enough room to return a product without carefully aligning it between several others.
There isn’t one empty-space percentage that fits every cabinet. Use a movement test instead. Remove a daily item and put it back. If you have to move something unrelated, reduce the load or change the position.
This is where an ordinary-looking setup often beats a tightly styled one. A slightly wider gap gives tired hands somewhere to put the dish soap after dinner.
Empty space also allows for small changes. A replacement bottle may be wider. A different pack of bags may need more room. A rigid arrangement can fail as soon as one product changes size.
After a week, notice where things have drifted. That spot may be closer to the way you use the cabinet.
Adjust the system rather than treating every misplaced item as a failure of discipline. Good storage makes the easy choice the sensible one.
What This Looks Like in Three Different Kitchens
A Narrow Rental Cabinet With a Pipe Through the Middle
Consider a rental cabinet with a central drain, a narrow opening, and no permission to drill. A full-width shelving unit might fit inside but be difficult to insert or remove.
A better starting point is two small washable trays, one on each side of the pipe. The wider side holds a portable caddy. The narrower side holds trash bags and a small bin of clean, dry cloths.
A lightweight door hook may help if the finish and clearance are suitable. Otherwise, skip it. There’s no need to use the door simply because it exists.
Keep the back center clear for plumbing access. Store bulky refills in another appropriate location.
This arrangement works because each piece can come out separately. You can clean the base, inspect for moisture, and take the storage with you when you move.
It also lets you test the layout with containers you already own before buying anything more fitted.
A Busy Family Kitchen With Constant Cleanup
In a family kitchen, the main pressure is frequent use. Someone needs a bag during breakfast. Someone else is loading the dishwasher while dinner cooks.
Give daily supplies one obvious position near the opening. Use a small number of broad labels so adults sharing the kitchen can follow the same arrangement.
Keep reserve stock separate. Otherwise, a new pack can get opened while the existing one is hidden behind it.
If young children can access the area, move chemicals to suitable locked storage out of reach. Use the lower cabinet for appropriate nonchemical supplies instead.
The cabinet should also be easy to reset while distracted. Choose open access for safe, frequently used items rather than several stacked lids and tiny compartments.
In this setting, a plain bin that everyone uses correctly is more valuable than a detailed arrangement maintained by one person.
Review what ends up on the counter. Those items often reveal where the storage is asking for too many steps.
A Deep Cabinet With a Garbage Disposal
A disposal changes the usable shape of the cabinet. One side may have enough floor space for a pull-out, while the other is interrupted by equipment, hoses, and connections.
Don’t force a symmetrical layout. Measure each side independently.
Place suitable removable storage only in clear areas. Keep access to the disposal and its connections available, and don’t allow containers to press against wiring or hoses.
For equipment-specific questions, use the manual for your model. Manufacturers such as InSinkErator provide product and support resources, but the arrangement needs to match the unit installed in your kitchen.
Keep any dedicated service tool in a labeled, secure location where an adult can find it. Follow the manufacturer’s safety instructions before any troubleshooting or service.
The practical goal is not to hide the disposal inside a wall of baskets. It is to make the remaining space useful without making future maintenance harder.
Put the System Together Without Buying Everything at Once
Begin with the cabinet you have, not a shopping cart full of organizers. Existing containers can help you test sizes and positions, provided they are sturdy, washable where needed, and suitable for the products involved.
Use this sequence to build the arrangement in manageable stages.
Dispose of unwanted cleaners responsibly. Don’t pour products together or assume they belong down the drain. The EPA’s household hazardous waste guidance explains why certain household products need careful handling and local disposal options.
Wait before buying a second round of organizers. A week of normal use tells you more than a photograph taken immediately after tidying.
If the same bottle keeps moving to the front, give it a front position. If a drawer stays empty, you may not need it. If everyone avoids a stiff pull-out, fix the access problem rather than adding a reminder label.
The best adjustments are often small.
Why Under-Sink Storage Stops Working—and How to Fix It
Most failed arrangements ask the cabinet to do too much. They hold too many products, squeeze storage against pipes, or make routine supplies inconvenient to reach.
The table below presents each issue with a clear cause and correction, making it easy to reuse as a structured troubleshooting section.
One issue deserves extra attention: buying more storage when the cabinet contains too much.
A new shelf can divide a crowded cupboard into two crowded levels. A larger basket can make forgotten products harder to see. Before adding anything, remove what is unsuitable, unused, or stored in unnecessary quantities.
That makes the remaining decisions much easier.
Questions Worth Answering Before You Shop
Make the Cabinet Easy to Use on an Ordinary Tuesday
A useful sink cabinet doesn’t need matching containers from wall to wall. It needs a place for the supplies you reach for, a safe approach to product storage, and enough open space to spot problems.
Start with the most irritating moment. Maybe you can’t find trash bags. Maybe cloths keep falling behind a bottle. Maybe every cleaning task begins with moving a heavy basket.
Solve that one point of friction first.
Then check whether the change makes returning the item easier, too. That is what keeps a tidy cabinet from becoming a one-day project.
A quick reset can be simple: return the daily supplies, remove anything that needs washing, check for moisture, and note whether a refill is running low. You don’t have to reorganize the whole cupboard every weekend.
The cabinet has done its job when cleanup involves fewer awkward reaches and fewer things in the way.
That’s a better result than a perfect photograph—and much more useful after dinner.


